


Another aircraft from the Fleet Air Arm! I'm starting to wonder if it's a conspiracy as all of the kits that I want to build can only be found in the form of some ancient kit that has 6 pieces. In the end it was a fun build and the result was at least a step up from the original kit.
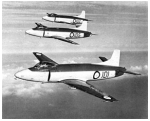
The Attacker developed from a Royal Air Force (RAF) fighter jet project, the E.10/44. The project was intended to be an interim fighter for the RAF while another aircraft, the Gloster E.1/44 (intended to be an improvement on the Gloster Meteor) was developed. Both were rejected by the RAF, and it was the Gloster Meteor and the de Havilland Vampire which were the RAF's first two operational jet aircraft. In response, Supermarine offered a navalised version of the project to the Admiralty. The prototype Attacker, Prototype 392, was first flown on the 27 July 1946, by test pilot Jeffrey Quill.
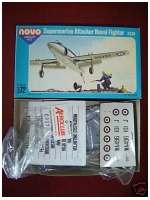
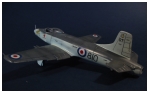
This is the Novo Attacker which is a very, very basic kit from the days of old. There are no wheel wells and cockpit is filled in with a little 'ball' on the top to signify the pilots' head.
As with most of these older kits however, the fit is very good. The parts go together very easily and only a little filler is needed here and there. The decals are basic, a little out of register but are clean and go on well.
The canopy thick, yellow and plain old junk, throw it away and use a replacement from Aeroclub who make some excellent, nice and thin canopies.
Although there is a decent amount of building required before you'll get anything resembling a modern kit, the building itself is simple and quite enjoyable.
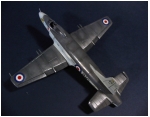
I started by cutting out the wheel wells and building a small amount of detail inside. I didn't bother with much detail here, anything was better than a flat bottom wing surface where the wheels stick out of.
Next I built the extended intakes, which by default open up into the fuselage. I just added some plastic card here and painted it black. You do need to be careful here to try and get the internal details to match up with the fuselage sides. Mine didn't
Next was the cockpit. I scratch built a basic cockpit with small plastic parts then stuck in an Aeroclub seat for details.
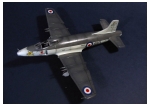
On the outside I cut out the flaps and dropped them and dropped the elevator. Not sure if these are in the correct position but I felt the aircraft needed to be 'dirtied up' a little as the basic shape is too simple.
Once everything was together I re-scribed some panel lines and ran over it with my new Trumpeter Rivet Maker.
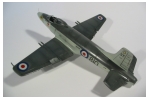
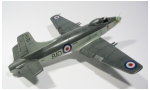
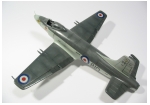
Not much to be said here, standard pre-shading with black followed by Extra Dark Sea Grey over Sky. I did have quite a bit of trouble with masking on this kit, I think mainly due to not having a new blade which was sharp enough and rushing it a little.
I didn't really bother too much about the undercarriage, I simply used the parts supplied with the kit and painted them dark grey. These should really have been scratch built for added detail.
The kit was sprayed with floor polish to protect it from the washes to come and to give a decent surface for the decals to lie in.
I used Modeldecal MD056 for the decals, which includes a really nice decal set for the Attacker. I've had nothing but excellent experiences with Modeldecal decals, they have some really cool subjects and seem to go on perfectly.
The kit was given another coat of future then a dark wash was added to highlight the panel lines. I really wonder if using a light colour would be better for this as black seems to get lost a bit on the Dark Sea Grey upper surfaces.
I added a few oil stains here and there then added some light grey chalk to the middle of the wing and fuselage panels. The gave the effect of sun bleaching and adds a lot of wear to the airframe.
Quite happy with the result. It was a really quick build of very old kit.

Check out our new Online Scale conversion tool. Convert from any scale in any unit of measurement to any other scale in any other unit.